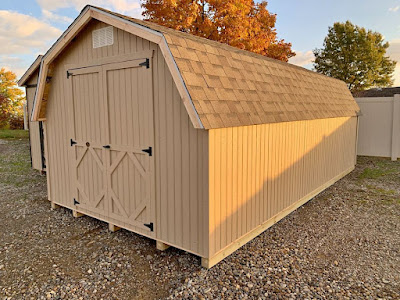
I. Introduction A Gambrel Roof Shed is a type of shed that has a unique two-sided roof design. It has two slopes on each side, making it resemble a barn roof. The Gambrel Roof Shed is a popular choice for outdoor storage and DIY projects due to its ample storage space and classic look.
II. Planning and Preparation Before building your Gambrel Roof Shed, there are several steps you should take to prepare. First, you'll need to choose a location for the shed that is flat and level. Then, you'll need to obtain any necessary permits from your local government. Next, you'll need to measure and mark the area where the shed will be built. Finally, you'll need to gather all the materials and tools you'll need for the project.
III. Building the Foundation The foundation is a crucial step in building any structure, including a Gambrel Roof Shed. There are three main options for the foundation: building a wooden frame, laying a concrete slab, or setting up a gravel base. Each option has its own advantages and disadvantages, so it's important to choose the one that works best for your needs and budget.
IV. Framing the Walls Once the foundation is in place, it's time to frame the walls of the shed. This involves creating wall frames and adding door and window frames. It's important to secure the wall frames in place properly to ensure the shed is sturdy and safe.
V. Installing the Gambrel Roof The Gambrel Roof is the most unique feature of this type of shed. It's important to create Gambrel
roof trusses that are strong enough to support the weight of the roof. Once the trusses are built, they can be attached to the top of the walls. Then, roof sheathing can be installed on top of the trusses to provide a solid base for the roof.
VI. Adding Doors and Windows After the walls and roof are in place, it's time to add doors and windows to the shed. This involves framing the openings for the doors and windows and then installing them. Make sure to properly seal the openings to prevent water and air from getting inside the shed.
VII. Finishing Touches The finishing touches of the Gambrel Roof Shed involve adding siding to the exterior of the shed, painting or staining it to protect it from the elements, and installing gutters to prevent water from pooling around the base of the shed. These steps will help make your shed look great and last for many years to come.
VIII. Conclusion Building a Gambrel Roof Shed can be a challenging but rewarding DIY project. By following these steps and taking the time to plan and prepare, you can build a sturdy and beautiful shed that will provide you with years of outdoor storage and workspace. Remember to take safety precautions throughout the building process, and don't hesitate to ask for help if you need it. Good luck!

No comments:
Post a Comment
Note: Only a member of this blog may post a comment.