Build a Pallet Shed DIY: A Simple Guide for Outdoor Storage

Build a Pallet Shed DIY: A Simple Guide for Outdoor Storage

Build a Pallet Shed DIY: A Simple Guide for Outdoor Storage

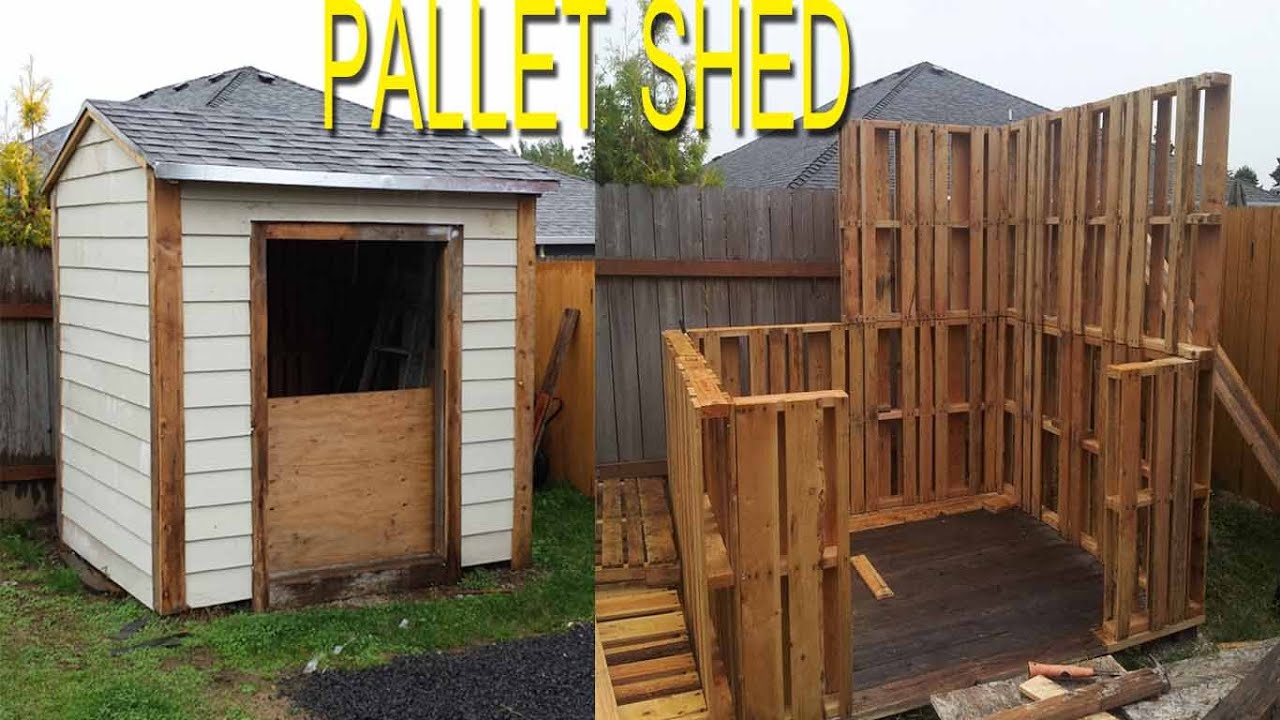
Tired of garden clutter and overflowing garages? A pallet shed offers a charming and surprisingly affordable solution for your outdoor storage needs. This simple DIY project lets you create a functional and aesthetically pleasing space without breaking the bank or requiring advanced carpentry skills. Follow this guide to build your own pallet shed and reclaim your outdoor space!

Planning Your Pallet Shed Project

Before you grab your hammer, meticulous planning is key. Determine the desired size of your shed based on your storage requirements. Consider the dimensions of the pallets you'll be using; standard pallets measure approximately 48 inches by 40 inches. Sketch a basic plan, noting the number of pallets needed for the walls, roof, and floor. Choose your location carefully, ensuring level ground and enough space for easy access. Check local building codes and regulations before starting construction â€" some areas may require permits for even small structures. Lastly, gather your materials!

Essential Materials

You’ll need more than just pallets! This list includes essentials for a sturdy shed:

  • Used pallets (number varies based on shed size)
  • Gloves
  • Safety glasses
  • Hammer
  • Screws (exterior-grade)
  • Drill/Driver
  • Level
  • Measuring tape
  • Shovel
  • Gravel or concrete pavers (for base)
  • Roofing material (e.g., corrugated metal, tarpaulin)

Building the Foundation and Walls

Start by preparing a level base. This prevents your shed from settling unevenly over time. A simple gravel base is sufficient for light-duty sheds, while heavier structures benefit from a concrete slab or pavers. Once the base is ready, assemble the pallet walls. Inspect each pallet thoroughly; remove loose nails, splinters, and any protruding metal. Use exterior-grade screws to connect the pallets vertically, creating sturdy walls. Remember to maintain consistent spacing for a uniform look. For increased strength, consider bracing the corners with additional wood supports.

Roof Construction and Finishing Touches

Construct the roof using additional pallets or suitable lumber. A simple gable roof is easy to build and provides good water runoff. Secure the roofing material to the frame, ensuring a watertight seal to protect your belongings. Consider adding a door using a reclaimed door or constructing one from pallets, remembering to secure hinges and a latch for security. Finally, consider adding a touch of personality! A coat of exterior paint or stain not only protects the wood but also enhances the aesthetics of your pallet shed, making it a charming addition to your outdoor space. You can even add shelves for increased storage.

Safety First!

Safety should always be your top priority. Wear safety glasses and gloves throughout the entire building process. Be cautious when handling pallets, as splinters and nails can cause injury. Ensure that the shed is structurally sound before storing heavy items. Remember that this is a basic guide, adjust and modify the plans to accommodate your specific needs and resources. Enjoy your new, custom-built pallet shed!

Share:

10x12 Pallet Shed Plans for Efficient and Affordable Storage

10x12 Pallet Shed Plans for Efficient and Affordable Storage

10x12 Pallet Shed Plans for Efficient and Affordable Storage

Hey there, fellow DIY enthusiasts! So you're looking to build a 10x12 pallet shed? Fantastic! You've come to the right place. Let's dive into how you can create a sturdy, stylish, and surprisingly affordable storage solution using reclaimed pallets. This isn't just about saving money; it's about embracing sustainability and creating something truly unique.

Why Choose a Pallet Shed?

Building a shed from scratch can be expensive and time-consuming. But what if I told you there's a way to get a fantastic storage solution for a fraction of the cost? That's the magic of pallet sheds! Using reclaimed pallets offers several key advantages:

  • Cost-Effective: Pallets are often free or very cheap to obtain. You can usually find them at businesses, construction sites, or even online marketplaces. Think of all that money you'll save!
  • Eco-Friendly: Repurposing pallets is a fantastic way to reduce waste and give new life to materials that would otherwise end up in a landfill. It's a great way to be environmentally conscious.
  • Rustic Charm: Pallet sheds have a unique, rustic aesthetic that adds character to any backyard. They offer a charming alternative to the standard, mass-produced sheds.
  • DIY-Friendly: While building a shed from scratch requires significant expertise, working with pallets is relatively straightforward, even for beginners. You don't need to be a master carpenter to get this done!

Planning Your 10x12 Pallet Shed

Before you start hammering nails, careful planning is crucial. A well-thought-out plan will save you time, materials, and headaches down the line. Here's what you need to consider:

Choosing Your Pallets

Not all pallets are created equal. Look for pallets that are in good condition, with minimal damage and no signs of rot or pest infestation. Heat-treated pallets (marked with "HT") are preferable as they haven't been chemically treated. Aim for pallets of similar size and type to make construction easier.

Location, Location, Location

Decide where you want to build your shed. Consider factors like access to the area, sunlight exposure (for ventilation), proximity to utilities (if you plan to add electricity), and local building codes. Check with your local authorities to ensure your shed plans comply with any regulations.

Foundation and Base

A solid foundation is essential for a long-lasting shed. You can opt for a simple concrete slab, gravel base, or even a wooden frame raised off the ground. The best option will depend on your budget, the ground conditions, and the level of permanence you require.

Building Your 10x12 Pallet Shed: A Step-by-Step Guide

This is a simplified overview. Detailed plans are best found online, but the general process looks something like this:

Step 1: Prepare the Pallets

Clean the pallets thoroughly, removing any dirt, debris, nails, or loose boards. Repair any damaged sections using wood filler or replacement boards. Sand down any rough edges for safety.

Step 2: Build the Frame

Construct a sturdy frame using pressure-treated lumber or other durable material. This will form the base for your shed walls. Make sure the frame is perfectly square and level. Measure twice, cut once!

Step 3: Attach the Pallets to the Frame

Carefully attach the pallets to the frame using screws or nails. Work systematically, ensuring that each pallet is securely fastened. Space them evenly for a uniform look.

Step 4: Add the Roof

Construct the roof using more pallets, plywood, or other roofing material. Consider the local climate when selecting your roofing material. You might want to add extra waterproofing to protect your belongings from rain or snow.

Step 5: Add the Door

Cut a door opening in one of the walls and install a sturdy door. You can use more pallets for the door or purchase a pre-made door. Consider adding a lock for security.

Step 6: Finishing Touches

Once the main structure is complete, you can add finishing touches such as paint, stain, or sealant to protect the wood and enhance the appearance of your shed. You could even add windows for better ventilation and lighting.

Tips for Success

  • Safety First: Always wear safety glasses and gloves while working with pallets and tools.
  • Measure Twice, Cut Once: Accuracy is crucial in construction. Take your time and double-check your measurements before cutting or attaching anything.
  • Use Appropriate Fasteners: Choose screws or nails that are strong enough to hold the pallets securely.
  • Seek Help When Needed: Don't hesitate to ask for help from a friend or family member, especially for lifting heavy pallets.
  • Have Fun!: Remember, this is a DIY project. Enjoy the process of creating something unique and useful for your backyard.

Commonly Asked Questions

Q: How long does it take to build a 10x12 pallet shed?

A: The time it takes varies depending on your experience and the complexity of your design. Expect to spend several days to a couple of weeks, working in stages.

Q: What tools do I need?

A: You'll need basic carpentry tools such as a hammer, saw, drill, screwdriver, measuring tape, level, and safety glasses.

Q: Can I use treated pallets?

A: While you *can*, it's generally recommended to avoid chemically treated pallets unless they're explicitly labeled safe for use around people. The chemicals can be harmful. Heat-treated pallets are the best option.

Q: How much does it cost to build a pallet shed?

A: The cost will largely depend on whether you source free pallets. If you need to buy them, the price can vary. However, even with purchasing pallets, it's significantly cheaper than buying a pre-made shed.

Q: Do I need a building permit?

A: Building permit requirements vary by location. Check with your local authorities before starting construction.

I hope this guide has given you the confidence to start your pallet shed project. Remember to plan carefully, work safely, and most importantly, have fun! Happy building!

Share:

Wooden Pallet Shed Plans for a Customizable and Low-Cost Build

Wooden Pallet Shed Plans for a Customizable and Low-Cost Build

Unlocking the Potential: Building Your Dream Pallet Shed

Tired of overflowing garages and cluttered yards? Yearning for a practical and aesthetically pleasing storage solution without breaking the bank? Then look no further! This guide walks you through building a customizable and low-cost wooden pallet shed. Forget expensive pre-fabricated structures â€" we'll harness the readily available and surprisingly versatile material of reclaimed wooden pallets to create your personalized storage haven. Get ready to unleash your inner builder and transform discarded pallets into a functional and stylish addition to your property!

Assessing Your Needs and Gathering Materials

Before diving into construction, meticulously plan your shed's dimensions and functionality. Consider the items you intend to store â€" gardening tools, bicycles, seasonal decorations? This dictates the necessary size and internal layout. Next, source your pallets. Check local businesses, construction sites, or even online marketplaces for free or inexpensive options. Inspect each pallet carefully for rot, damage, and loose boards. Remember, a strong foundation is key to a sturdy shed!

Essential Materials Beyond Pallets:

Beyond the pallets themselves, gather the following:

  • Concrete blocks or a suitable foundation: Provides a level base and protects against moisture.
  • Pressure-treated lumber: For the framing, roof supports, and any areas requiring extra durability.
  • Roofing material: Choose from inexpensive options like tar paper, corrugated metal sheeting, or even recycled materials.
  • Nails, screws, and appropriate fasteners: Select high-quality options that ensure long-lasting stability.
  • Tools: Hammer, saw, drill, measuring tape, level, safety glasses, work gloves.
  • Optional additions: Door hinges, a latch, paint or stain for weather protection and aesthetic enhancement.

Constructing the Pallet Shed Frame

Begin by creating a level base using concrete blocks or your chosen foundation material. This ensures the shed's stability and prevents sinking or uneven settling. Once the foundation is set, carefully arrange the pallets to form the shed's walls. Use pressure-treated lumber to create a sturdy frame around the perimeter of your pallet structure, securing it tightly to the pallets with screws or nails. Ensure the frame is perfectly square and plumb using a level, as this directly impacts the overall stability of the shed.

Tips for a Solid Frame:

  • Reinforce weak points: Use additional support beams where needed to ensure structural integrity.
  • Pre-assemble sections: This simplifies the construction process and allows for more accurate fitting.
  • Securely fasten: Use multiple fasteners at each connection point for optimal stability.

Roofing and Finishing Touches

Construct the shed's roof using pressure-treated lumber, creating a sturdy framework that supports your chosen roofing material. Ensure proper overhang to protect the walls from rain and snow. Securely attach your roofing material, ensuring complete water-tightness. Finally, add your chosen door, hinges, and latch for secure access. Consider painting or staining the pallets and lumber for weather protection and a polished finish. Allow for adequate drying time before storing items inside. Your personalized pallet shed is now ready!

Personalization and Customization Options:

  • Add windows for ventilation and light.
  • Install shelves for better organization.
  • Paint or stain in your favorite color.
  • Add decorative elements such as plants or hanging lights.

Building a pallet shed is a rewarding DIY project that combines practicality, sustainability, and affordability. By following these detailed steps, you can create a custom storage solution that perfectly fits your needs and adds a unique charm to your outdoor space. Happy building!

Share:

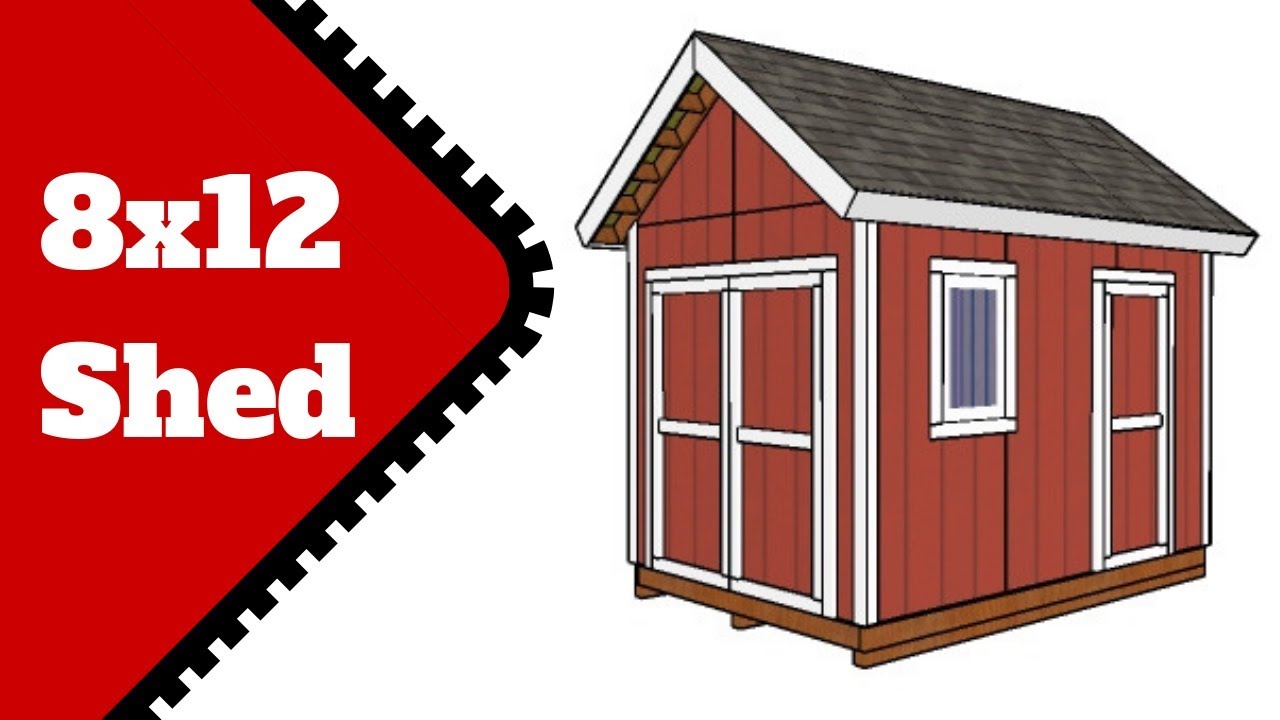
Maximize Storage and Comfort with These 8x12 Shed Plans with Porch

Maximize Storage and Comfort with These 8x12 Shed Plans with Porch

Maximize Storage and Comfort with These 8x12 Shed Plans with Porch

Hey there, fellow shed enthusiasts! Are you dreaming of that perfect outdoor storage solution? Something that's not just practical, but also adds a touch of charm to your backyard? Then you've come to the right place! We're diving deep into the wonderful world of 8x12 shed plans, specifically those with a porch â€" the ultimate blend of functionality and relaxation. Let's explore how you can build your dream shed, maximizing both storage and comfort.

Why an 8x12 Shed with a Porch?

An 8x12 shed offers a fantastic balance. It's big enough for serious storage â€" think lawnmowers, garden tools, bicycles, and more â€" but not so large that it becomes overwhelming to build or maintain. Adding a porch takes it to the next level! The porch isn't just a pretty face; it adds significant value:

  • Extra usable space: Perfect for potting plants, enjoying your morning coffee, or just relaxing with a good book.
  • Added protection: The porch provides a buffer zone, shielding the main shed door from the elements, keeping it cleaner and extending its lifespan.
  • Increased curb appeal: Let's be honest, a shed with a porch just looks nicer! It elevates your outdoor space and enhances your property's overall aesthetic.
  • Versatile functionality: Depending on your design, the porch can become a workshop area, a place to store firewood, or even a small potting station.

Planning Your Dream 8x12 Shed with Porch

Before you grab your hammer and nails (or your power tools!), careful planning is key. Here's a breakdown of crucial considerations:

Location, Location, Location!

Think about sunlight, access to utilities (if needed), proximity to your house, and the overall flow of your yard. You'll want easy access to your shed without it being an eyesore. Consider the prevailing winds too â€" you might want to position the porch to shelter the main entrance from the worst weather.

Choosing Your Materials

The materials you choose will greatly impact the cost and longevity of your shed. Popular choices include:

  • Wood: Classic, aesthetically pleasing, and relatively easy to work with, but requires regular maintenance.
  • Vinyl: Low maintenance, durable, and resistant to rot and insects. Can be more expensive upfront.
  • Metal: Extremely durable and low maintenance, but can be more challenging to work with and might not have the same aesthetic appeal as wood.

Think about your budget and the overall look you want to achieve. Don't forget to factor in the cost of roofing materials, too!

Designing the Porch

The porch design possibilities are endless! Consider these elements:

  • Size: How much space do you realistically need? A small porch can be cozy, while a larger one might offer more functionality.
  • Roof style: A simple gable roof is a common and practical choice, but you could also explore more elaborate designs.
  • Railings: For safety and aesthetics, railings are usually a good idea, especially if you have children or pets.
  • Flooring: Consider concrete, pressure-treated wood, or composite decking. Each option has its own pros and cons in terms of cost, maintenance, and durability.

Door and Window Placement

Strategically placing doors and windows maximizes natural light and ventilation. Consider the prevailing winds and sun path when making these decisions. A well-placed window can make a huge difference in the overall feel of the shed, making it brighter and more inviting. Don’t forget about the potential for adding a window to the porch itself!

Building Your 8x12 Shed with Porch: A Step-by-Step Overview

Building a shed is a rewarding project, but it's a significant undertaking. If you're not experienced with construction, it's a great idea to enlist the help of a friend or family member, or even hire a professional. Here's a generalized overview. Always refer to detailed plans and building codes for your specific location.

  • Foundation: Prepare a solid foundation, whether it's a concrete slab, compacted gravel, or wooden sleepers.
  • Framing: Construct the frame of the shed and the porch, ensuring everything is square and level. This is where accurate measurements are critical.
  • Sheathing: Apply sheathing to the walls and roof, providing a solid base for your siding or roofing material.
  • Siding and Roofing: Install your chosen siding and roofing material, paying attention to weatherproofing and sealing.
  • Doors and Windows: Install the doors and windows, ensuring they are properly sealed and weatherproofed.
  • Finishing Touches: Add trim, paint, or stain, and any other finishing touches to complete the look.

Remember, safety is paramount. Wear appropriate safety gear, use caution when operating power tools, and take breaks when needed. Don't rush the process!

Beyond Storage: Creative Uses for Your 8x12 Shed with Porch

The beauty of an 8x12 shed with a porch is its versatility. While storage is a major advantage, think about these creative uses:

  • Home office or studio: A quiet and private space away from the hustle and bustle of the house.
  • Guest house or art studio: With some additional insulation and finishing, you could turn it into a comfortable space for guests or a creative retreat.
  • Workshop: A dedicated space for your hobbies and projects.
  • Outdoor kitchen: Imagine grilling, prepping, and enjoying meals in a sheltered, backyard setting.

Commonly Asked Questions

Q: Do I need a building permit for an 8x12 shed with a porch?

A: Building permit requirements vary by location. Check with your local authorities before starting construction.

Q: How much does it cost to build an 8x12 shed with a porch?

A: The cost depends heavily on the materials you choose and the complexity of the design. Expect a range from a few thousand dollars to significantly more, depending on your choices.

Q: Can I build an 8x12 shed with a porch myself?

A: Yes, many people successfully build their own sheds. However, it requires some basic carpentry skills and planning. If you lack experience, consider seeking assistance or hiring a professional.

Q: What are the best resources for shed plans?

A: You can find many plans online, through home improvement stores, or from specialized shed plan companies. Be sure to carefully review the plans before purchasing them.

Building your own 8x12 shed with a porch is a rewarding project. With careful planning and attention to detail, you'll create a valuable addition to your property â€" a space that's both practical and aesthetically pleasing. Happy building!

Share:

Step-by-Step Guide to Building a Cost-Effective 8x12 Lean-To Storage Shed

Step-by-Step Guide to Building a Cost-Effective 8x12 Lean-To Storage Shed

Building Your Dream (and Budget-Friendly!) 8x12 Lean-To Storage Shed

Hey there, fellow DIYers! So you're thinking about building a storage shed, huh? Smart move! And you want to do it affordably? Even smarter! Let's tackle this 8x12 lean-to project together. This isn't rocket science, I promise. With a little planning and elbow grease (okay, maybe a power drill too), you can have a fantastic, functional storage shed without breaking the bank.

Phase 1: Planning & Prep â€" The Foundation of Success

Before you even think about touching a hammer, let’s get organized. This phase is crucial, trust me. Rushing through it will only lead to headaches down the line (and potentially, wasted materials!).

Choosing Your Location

Where will your masterpiece reside? Consider these factors:

  • Proximity to your house: Do you want it close for easy access? But also, how close is *too* close?
  • Accessibility: Will you need a level surface, or will you need to do some grading? Think about getting materials to the site. A flatter area is your friend.
  • Sunlight and drainage: You want a spot that gets decent drainage to prevent water damage. Too much sun might fade stored items.
  • Local regulations: Check with your local government about any permits or setbacks required for structures like sheds.

Gathering Your Materials

This is where your budget really comes into play. The key is to find the best balance between quality and affordability. Consider visiting a few different lumber yards and comparing prices. Don’t be afraid to negotiate! Here’s a basic list:

  • Pressure-treated lumber: For the foundation, framing, and floor. Pressure-treated is crucial for longevity, especially if your shed is close to the ground.
  • Plywood: For the roof and siding. Consider using OSB (Oriented Strand Board) for a cheaper option, but it's not as aesthetically pleasing.
  • Roofing material: Asphalt shingles are a popular and affordable choice. Metal roofing is more durable but pricier.
  • Fasteners: Nails, screws, and construction adhesive. Buy more than you think you'll need â€" you can always return extras.
  • Door hardware: A simple door kit can save you time and hassle.
  • Optional extras: Windows (for ventilation and light), paint or stain (to protect the wood and add curb appeal), and a concrete base or gravel foundation.

Tools of the Trade

You’ll need some basic tools. If you don't own them already, consider borrowing from a friend, renting them, or investing in used tools. A good starter kit might include:

  • Measuring tape and level
  • Hammer
  • Drill with assorted drill bits
  • Saw (circular saw, hand saw, or reciprocating saw)
  • Shovel (if you’re preparing a gravel base)
  • Safety glasses and work gloves

Phase 2: Construction â€" Let's Build!

Building the Foundation

A simple and affordable foundation for an 8x12 lean-to is a gravel base. This is less expensive than concrete. Level the ground, then lay down a layer of landscape fabric to prevent weeds. On top of this, put down at least 4 inches of compacted gravel. This provides a good, level base. A concrete foundation is obviously more robust, but more expensive.

Framing the Walls and Floor

This is where your measurements become crucial. Build your floor frame first, using pressure-treated lumber. Next, construct the wall frames, ensuring they are plumb (perfectly vertical). Attach the walls to the floor frame. Remember, you're building a lean-to, so one side will be attached to an existing structure (like your house or garage).

Adding the Roof

For a lean-to, the roof is fairly straightforward. It's simply a sloped roof, usually running from the higher point (the wall attached to your house) to the lower point (the free-standing wall). You'll need rafters (the sloped beams) and sheathing (plywood or OSB). Make sure your roof has enough pitch to allow for proper water runoff.

Siding and Roofing

Once the framing is complete, it's time to add the siding and roofing. This is where your chosen materials come into play. Apply the siding neatly and securely. Then, install your roofing material according to the manufacturer’s instructions. Remember to properly seal around any gaps to prevent leaks.

Finishing Touches

Install the door, add any windows you've chosen, and paint or stain the shed to protect the wood and enhance its appearance. Consider adding a simple latch for security.

Phase 3: Celebrate Your Achievement!

Congratulations! You've built your own 8x12 lean-to storage shed! Pat yourself on the back â€" you deserve it. Take some time to admire your handiwork. Now you can start organizing all that stuff you’ve been meaning to store away.

Commonly Asked Questions

Q: How long does it take to build an 8x12 lean-to shed?

A: This depends on your experience level and how much time you can dedicate each day. A reasonably experienced DIYer could probably complete it in a long weekend, while a beginner might take a week or two.

Q: How much does it cost to build an 8x12 lean-to shed?

A: Costs can vary greatly depending on materials chosen. You could build a basic shed for under $500 â€" $1000, or spend significantly more if you opt for higher-end materials or hire help.

Q: Do I need a permit to build a shed?

A: Local building codes vary. Check with your local authorities to determine whether you require a permit. It's always better to be safe than sorry.

Q: Can I build this shed alone?

A: While it's possible, having a helper would definitely make the job easier and safer, especially for lifting and positioning heavier materials.

Q: What if I make a mistake during construction?

A: Don't panic! Everyone makes mistakes. Try to learn from them. Sometimes you can fix them easily. If not, remember, you can always adjust your plans as needed.

Remember, this is just a guide. Feel free to adapt it to your specific needs and budget. Have fun building!
Share:

8x12 Shed Plans for DIYers: Building a Shed with Style and Function

8x12 Shed Plans for DIYers: Building a Shed with Style and Function

8x12 Shed Plans for DIYers: Building a Shed with Style and Function

Tired of cluttered garages and overflowing storage spaces? Yearning for a dedicated haven for your gardening tools, bikes, or that beloved collection of vintage snowshoes? Building your own 8x12 shed offers a rewarding DIY project and a practical solution to your storage woes. This guide provides detailed plans and insights to help you construct a stylish and functional shed that perfectly complements your property.

Planning Your 8x12 Shed Project

Before you even touch a tool, meticulous planning forms the bedrock of a successful shed construction. This includes more than simply sketching a box; you need a comprehensive blueprint encompassing every detail. Begin by defining your shed's purpose. Will it house lawn equipment, serve as a workshop, or act as a charming garden retreat? This dictates the internal layout, shelving needs, and potential for added features like windows or electricity.

Next, secure the necessary permits from your local authorities. This might seem tedious, but it prevents costly setbacks later. Carefully consider the shed's location on your property; factor in accessibility, sunlight exposure (for natural light and ventilation), and proximity to utilities. Lastly, create a detailed materials list, accounting for lumber, roofing, hardware, and any specialized components. This meticulous approach minimizes trips to the hardware store and keeps your project on schedule.

Foundation and Framing: Laying the Groundwork

Choosing the Right Foundation

A solid foundation is paramount for a long-lasting shed. Several options exist, each with its own pros and cons. A concrete slab provides unmatched stability but requires more advanced skills and tools. Alternatively, consider using concrete blocks for a simpler, cost-effective approach. For less permanent installations, a gravel base offers a quick solution, but it might require more maintenance over time. Select the foundation type that best aligns with your skillset and budget.

Framing the Shed Walls and Roof

With the foundation set, erect the walls using pressure-treated lumber for durability. Precise measurements are crucial here. Utilize a level and plumb bob to ensure perfectly square corners and vertical walls. Once the walls are framed, build the roof structure. Consider the roof pitch; a steeper pitch sheds snow more effectively in colder climates. Properly bracing and securing the roof rafters ensures stability and longevity.

Siding, Roofing, and Finishing Touches

The exterior of your shed dictates its aesthetic appeal. A wide array of siding options exists, from cost-effective vinyl to more rustic choices like cedar or metal. Choose a material that complements your home's style and withstands local weather conditions. Once the siding is installed, focus on the roofing. Asphalt shingles are a common and relatively inexpensive choice, but metal roofing offers superior durability and longevity. Ensure proper underlayment and flashing to prevent leaks. Finally, add finishing touches such as doors, windows, and trim to complete the look.

Essential Tools and Safety Precautions

Building a shed requires a range of tools, from basic hand tools like hammers and saws to power tools like drills and circular saws. Invest in quality tools; they ensure accuracy and efficiency. Remember to prioritize safety throughout the entire project. Wear appropriate safety gear, including eye protection, hearing protection, and work gloves. Always follow safe operating procedures for all power tools. Before starting any work, carefully review your plans and ensure you understand each step.

Adding Functionality and Style

Don't stop at the basics! Consider incorporating features that enhance both functionality and aesthetics. Install shelving to maximize storage space. Add windows for natural light and ventilation. Paint the exterior in a color that harmonizes with your surroundings. These small details can transform your shed from a simple storage unit into a visually appealing and highly functional addition to your property. A well-planned and meticulously built 8x12 shed serves as both a practical storage solution and a testament to your DIY skills.

Remember to consult multiple resources and adapt these plans to your specific needs and local building codes. Happy building!

Share:

Building a Lean-To Shed: A Step-by-Step Guide to Creating Extra Storage Space in Your Backyard


Lean-To Shed

It was a beautiful Saturday morning, and I had decided that today was the day I would build a lean-to shed in my backyard. I had been wanting to create some extra storage space for my tools and gardening equipment, and a lean-to shed seemed like the perfect solution. I had already gathered all the necessary materials, so it was time to get to work.

First, I marked out the area where I wanted the shed to go using some stakes and string. I had chosen a spot against the back wall of my house that had good drainage and plenty of sunlight. Once I was satisfied with the placement, I used a shovel to dig out the area to a depth of about six inches.

Next, I laid down a layer of gravel to help with drainage, and then I began building the frame for the shed. I used pressure-treated 2x4s for the frame, cutting them to the appropriate lengths using a saw. I attached the pieces together using galvanized screws, making sure everything was level and plumb as I went.

Once the frame was complete, I added some cross-bracing to make it more stable. Then, I installed the roof rafters using more 2x4s. I made sure to space them evenly and to leave a slight overhang at the front of the shed to protect against rain.

With the frame and roof in place, it was time to add the siding. I used corrugated metal panels for the walls, attaching them to the frame using screws and washers. The metal was lightweight and easy to work with, and it would stand up well to the elements.

Finally, I added some trim pieces around the edges of the shed to give it a finished look. I used some leftover pressure-treated lumber for this, cutting it to size and attaching it using more screws. I also installed a door using a pre-made kit that I had purchased at the hardware store.

By mid-afternoon, the shed was complete! It was a lean-to design, which meant that it was open on one side and attached to the back of my house. This made it easy to access from the yard, and it provided plenty of storage space for all my gardening tools and supplies.

Overall, I was really happy with how the project turned out. It had taken a bit of work, but it was definitely worth it to have this new space in my backyard. Now I could focus on my gardening without worrying about where to store everything!

Share: